
Leave A Message
If you are interested in our products and want to know more details, please leave a message here, we will reply you as soon as we can.

Hello everyone, In our previous article, we revealed the first three of the 6 core indicators used to judge WPC product quality: Pressure Strength, Falling Ball Impact, and 72-Hour Boiling Water Absorption. If you missed it, feel free to check our previous post.
Today, we are going to tackle the remaining three "hidden levels": Bending Creep, Buoyancy Density, and Screw Holding Power.
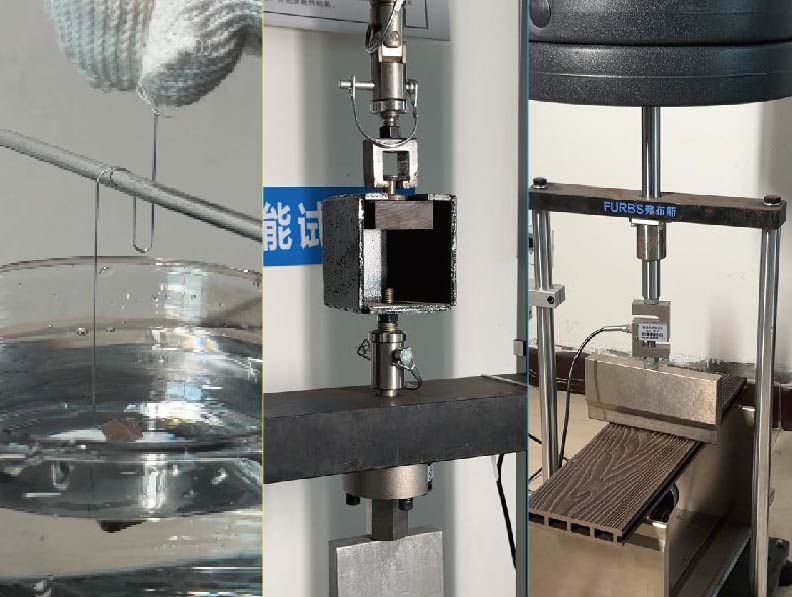
(Fun fact: To prepare for the bending creep test, I carried out a huge pile of gym weights. My colleagues thought I was going to work out, but I was actually testing the durability of our new boards!)
As always, before any testing begins, the samples must be placed in a constant temperature and humidity chamber at 23°C and 50% humidity for 24 hours to eliminate environmental variables.
1. 24-Hour Bending Creep: Testing Long-Term Toughness
The term "bending creep" might sound highly technical. Simply put, it means forcibly bending the WPC board to deform it. However, this test isn't about breaking the board. It's about keeping the board in a deformed state for a long time, then releasing the force to see how well it recovers. This directly tests the board's toughness and long-term stability. If a board is prone to sagging or warping under prolonged pressure and sun exposure, it means its creep resistance is poor. Since human force cannot maintain constant pressure for 24 hours, we need specialized equipment.
How to Test:
Place the treated board on the bending creep testing machine.
Place a digital dial indicator at the bottom to record the initial value (d0).
Place weights one by one onto the sensor platform until the machine screen reaches 750N, and record the dial indicator value (d1).
Maintain this pressure for exactly 24 hours.
After 24 hours, remove the weights one by one. Observe the board's recovery. Once stabilized, record the dial indicator value (d2).
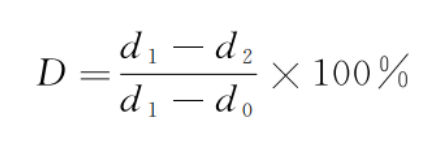
Standard:
D represents the flexural creep recovery rate; $d_1$ is the dial indicator reading after the specimen has been subjected to a load (weight) for 24 hours; $d_2$ is the dial indicator reading after the load has been removed following the 24-hour period; and $d_0$ is the initial dial indicator reading taken before the load was applied. The final value is the average of three repeated tests. According to the national standard, the recovery rate must be 75% or greater.
2. Buoyancy Density Test: Weighing the "Real Material"
This test is quite straightforward but requires strict conditions, especially regarding water quality.
How to Test:
First, cut a small 50mm x 50mm sample from the WPC board and weigh its dry mass in air using a high-precision balance. Next, prepare a bottle of pure industrial distilled water. (Pro Tip: Never use tap water or water with impurities, as they will affect the accuracy of the density measurement.) Completely immerse the sample in the distilled water to observe its floating/sinking state, gently removing any air bubbles.
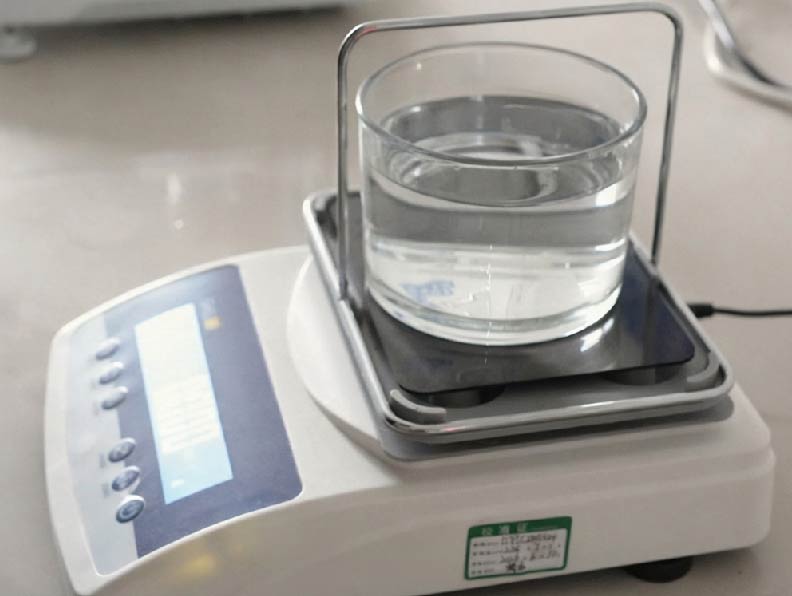
Finally, use precision instruments to measure the sample's apparent mass in water and calculate its actual physical density (g/cm³) using Archimedes' principle. The test is typically repeated to ensure the result meets the standard requirement of ≥0.75 g/cm³.
Standard:
High-quality WPC boards, due to good extrusion processes and dense internal structures, have high density. The national standard requires the density to be ≥ 0.75 g/cm³. If a board floats entirely on the water like foam, it means it has been over-foamed and its density is substandard. Such boards will have significantly lower load-bearing and impact resistance.
3. Screw Holding Power: Determining Installation Stability & Wind Resistance
This test aims to check if it's convenient for installers to drive screws and, more importantly, if the screws hold firmly.
Let me give you a vivid analogy: Imagine planting a tree. To prevent it from being blown over by the wind, you need to check if the soil is firm enough.

The soil is our WPC board, and the tree is the screw. Loose screws will severely impact the board's lifespan. While installation skills may vary, as manufacturers, we can't just blame the installers. To avoid disputes, the screw holding power test is essential.
How to Test:
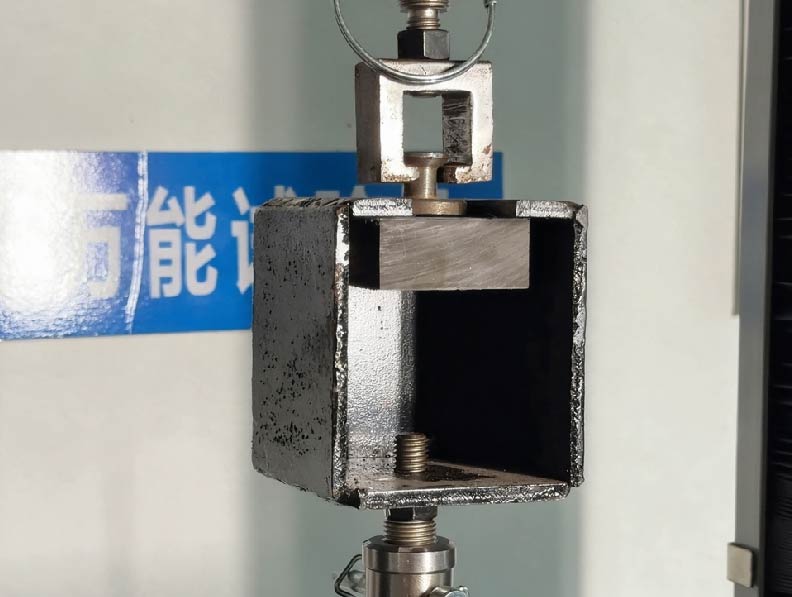
The equipment used here is the same testing machine as the pressure strength test, but instead of pressing down, it pulls up.
Prepare a small square piece of board. Mark the center point and fix a screw into the center.
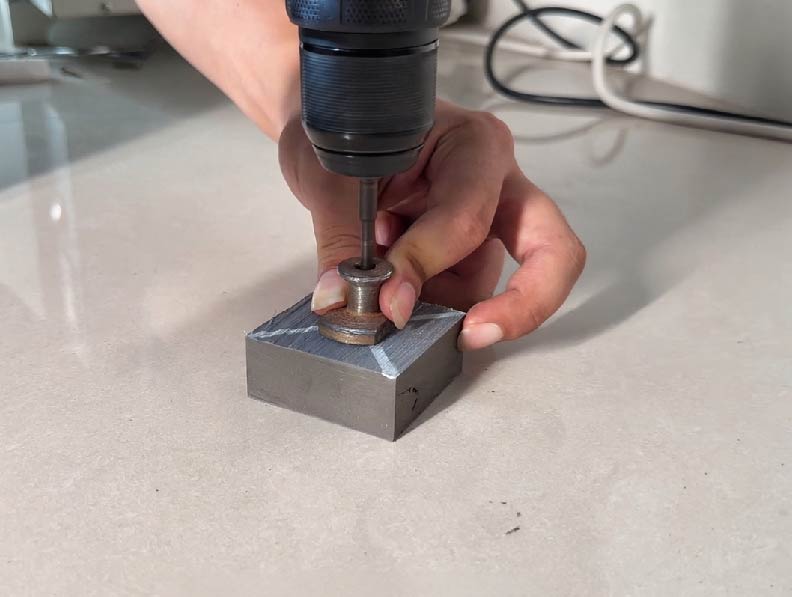
Place the board into a metal box with the screw pointing upwards, protruding through a slot in the top.Use the machine's clamp to grip the screw. Start the machine to slowly apply upward force.Continue until the screw is pulled out, and check the peak force value displayed on the monitor.
Standard:
Currently, there is no unified national standard for this specific metric in China. Our factory strictly follows the Korean KS standard, requiring the value to reach Hollow boards are required to be greater than 400 N, and solid boards are required to be greater than 780 N.
Conclusion
That wraps up the 6 key indicators for evaluating WPC material quality. The standards and data shared in this article are based on our factory's practical experience and are intended to help you better understand WPC material testing and quality evaluation.
Still have questions about a specific test? Or would you like to learn more about other testing methods, such as Fire Rating or Anti-UV performance? Leave a comment below! We may select the most requested topic and cover it in a dedicated article with detailed testing procedures and practical examples.
If you are looking for reliable WPC materials or need further technical information for your project, feel free to contact us. Our team will be happy to assist you.
If you found this article helpful, don't forget to like, follow, and bookmark it. Mr. Dou sends his regards and wishes you success and prosperity!